Published: Updated:
Recipe Scanner: How to Scan Recipes Without Retyping Them
There is a particular kind of recipe that never makes it into a tidy digital collection.
It is the page you photographed from a cookbook before returning it to a friend. The index card with a flour mark over one corner. The screenshot you took months ago and now cannot find among 8,000 other photos.
A recipe scanner solves a very ordinary problem: it turns a picture of a recipe into text you can review, edit, search, and actually cook from. Instead of retyping every ingredient and instruction, you start with a recognized draft and spend your time checking the details that matter.
That last part is important. Scanning is not the same as blindly trusting the result. A good workflow keeps the original image nearby and gives you a chance to correct quantities, fractions, temperatures, and unusual formatting before the recipe becomes part of your collection.
What a recipe scanner actually does
At its simplest, recipe scanning has three stages:
- You upload or photograph a recipe.
- The text is recognized and separated into useful information such as the title, ingredients, and cooking steps.
- You review the result before saving it as an editable recipe.
The useful part is not merely turning pixels into words. A plain OCR scan can leave you with one large block of text. For cooking, you want ingredients that still look like ingredients, instructions in the right order, and quantities you can check before putting a pan on the stove.
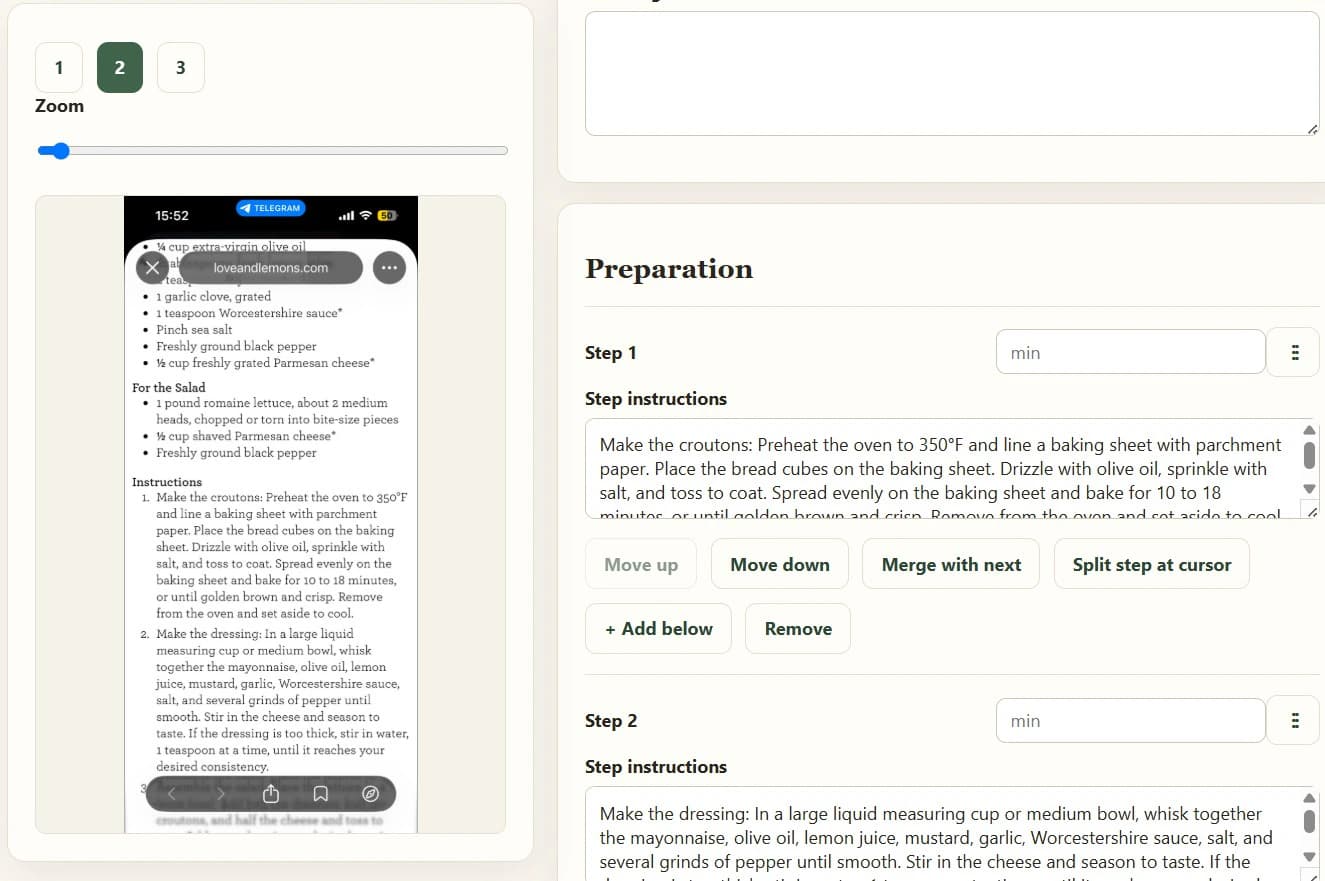
Cookmory follows that review-first approach. In the Import & Export workspace, you can upload a recipe photo or screenshot, inspect the recognized content, make corrections, and only then save it to your collection.
What can you scan?
Cookbook pages
A printed cookbook is usually the easiest source. The layout is predictable and the type is clear. A quick photo can save a recipe you use often without turning an entire book into a typing project. If a recipe continues onto a second page, photograph the pages in order and make sure the ingredient list is not cut off at the binding.
Recipe cards and printed sheets
Old index cards, printouts, magazine clippings, and pages from a family binder are ideal candidates. They are often valuable enough to keep, but awkward to search when you need one specific dish. Scanning gives you a working digital copy while the original can stay in the box or folder where it belongs.
Screenshots
Screenshots are convenient at the moment you save them and terrible six months later. If the original recipe is no longer available as a webpage, a screenshot can still be turned into a structured recipe. If the page is still online, importing the URL is usually cleaner because the source can remain attached to the saved recipe. See how to save recipes from websites for that workflow.
Handwritten family recipes
Cookmory reads printed recipe text. For a handwritten recipe, keep the original image and enter the recipe manually.
If you are collecting recipes from relatives, the broader guide to making a family cookbook explains how to preserve the story and the original source alongside the cleaned-up recipe.
A photo is not yet a useful recipe collection
Keeping a photo of a recipe is better than losing it. But a camera roll is not a cookbook.
A photo normally cannot answer questions such as:
- Which saved recipes contain chicken?
- What can I cook in under 30 minutes?
- Where is the cake recipe my aunt sent last winter?
- Which version did I change after the first attempt?
Once the recipe is stored as structured text, you can give it a clear title, search it, add tags or notes, and keep it with the rest of your collection. If you already have scattered screenshots, use the same simple system described in How to Organize Recipes Digitally: one permanent home, a few broad folders, useful tags, and search as the safety net.
How to scan a recipe so you spend less time fixing it
Recognition quality starts before the software sees the image. A few small habits make a large difference.
1. Give the page even light
Avoid a bright lamp on one side and a dark shadow on the other. Window light is usually enough. Glossy cookbook pages are easier to read if you move the phone slightly until the reflection disappears.
2. Keep the camera parallel to the page
A steep angle makes lines converge and can turn a clean ingredient list into a harder recognition problem. Hold the phone directly above the page when possible.
3. Include the whole recipe, but not half the kitchen
Leave a small margin around the page or card. Do not crop off ingredient quantities, step numbers, temperatures, or the final line of a method. A tightly framed recipe is easier to interpret than a photo containing the cookbook, table, coffee mug, and three other pages.
4. Photograph multi-page recipes in order
For a recipe that continues across pages, capture each page separately and keep the sequence obvious. Check whether a sentence or ingredient group continues from one image to the next.
5. Review the small symbols first
Fractions and units are the first things worth checking. `1/2`, `½`, and older forms such as `1\2` can be interpreted differently. The same is true for `tsp` versus `tbsp`, decimal commas, degree symbols, and compact notes such as `180°C / 350°F`. A scanner can save ten minutes of typing and still leave one character that matters very much to dinner.
The four things I would always check before saving
Quantities and fractions
Look closely at `1/4`, `1/2`, `3/4`, decimals, and numbers written close to unit abbreviations.
Units
Make sure teaspoons, tablespoons, grams, millilitres, cups, and pieces have not been merged with the ingredient name or confused with one another.
Oven temperature and cooking time
A missing zero in `180°C` is obvious. A missing digit in `35 minutes` can be less obvious until the food is already in the oven.
Ingredient groups and step order
Recipes often split ingredients into sections such as “dough”, “filling”, or “sauce”. Preserve those groups when they make the cooking order clearer. Multi-column layouts and magazine pages can also make recognition read down the wrong column, so check the first and last word of each step.
Scan, review, then organize: a practical Cookmory workflow
- Open Import & Export.
- Choose the image/photo import option.
- Upload the recipe photo or screenshot.
- Review the recognized title, ingredients, quantities, and steps.
- Correct anything that looks doubtful.
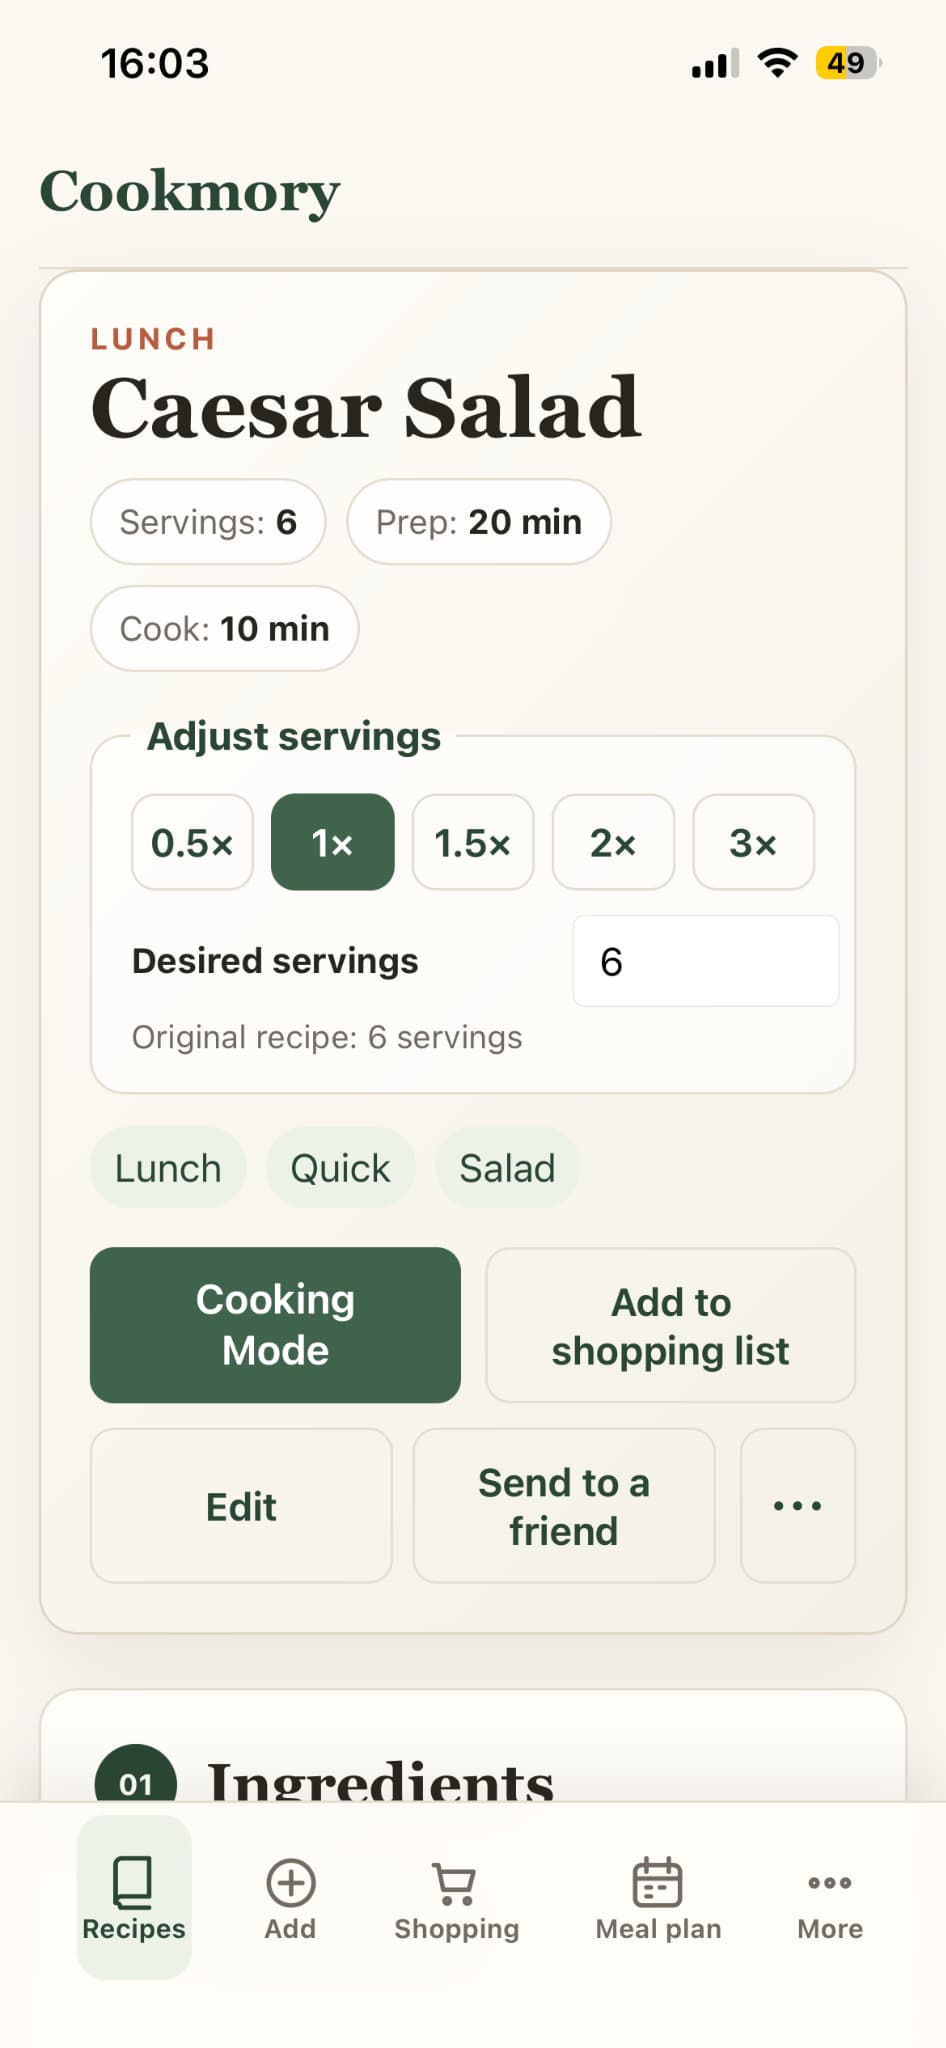
- Save the recipe to your collection.
- Add a folder, a few useful tags, or a personal note if you will need them later.
Photo and screenshot import is available on the current Cookmory plans; the pricing page shows the up-to-date plan limits and features. The goal is not to make the scan look technologically impressive. The goal is to have a recipe you can find and trust the next time you cook it.
When scanning is the wrong tool
| Source you have | Better starting point |
|---|---|
| Cookbook page or recipe card | Scan/import the image |
| Screenshot or photo | Scan/import the image |
| Live recipe webpage | Import the website URL |
| Digital cookbook in PDF | Import the PDF |
| Your own recipe from memory | Enter it manually |
If a clean source already exists, use it. Taking a screenshot of a webpage only to scan the screenshot creates an unnecessary extra step.
If your recipes come from several kinds of sources, the broader guide to importing recipes from websites, photos, PDFs and text will help you choose the shortest route for each one.
Keep the original when the recipe matters
For an ordinary weeknight recipe, the digital version may be all you need. For an old family card, keep both. The cleaned-up recipe is for cooking. The original image is evidence: handwriting, crossed-out quantities, stains, notes in the margin, and all the context that a transcription removes.
A small scanning habit works better than a weekend project
If you have a box of recipe cards or years of screenshots, do not start by promising yourself you will digitize everything. Scan five recipes you actually use. Cook from them. Fix the little errors you notice. Decide which fields and tags are genuinely useful. Then scan another five.
Common questions about recipe scanning
Can I scan a recipe from a photo?
Yes. A clear photo of a printed recipe, card, or screenshot can be recognized and turned into editable text. The better the lighting and framing, the less correction you will usually need.
How should I save a handwritten recipe?
Keep the original image and enter a handwritten recipe manually. Cookmory is designed for printed recipe text.
Is a recipe scanner the same as OCR?
OCR is the text-recognition part of the process. A useful recipe scanner goes further by turning the recognized content into recipe-shaped information that you can review and save.
Should I delete the original photo after scanning?
For disposable screenshots, you may choose to remove them after checking the saved recipe. For family cards, handwritten notes, or anything with sentimental value, keep the original image as a source.
What if the recipe is already on a website?
Use URL import when possible. It is usually cleaner than screenshotting and scanning the page, and it makes it easier to keep the original source attached.
Turn the next recipe photo into something you can find again
You do not need to digitize your whole kitchen at once. Start with one cookbook page or one screenshot you have already cooked from.
Try Cookmory and turn that image into an editable recipe, check the details, then keep it with the rest of your collection instead of sending it back into the camera roll.